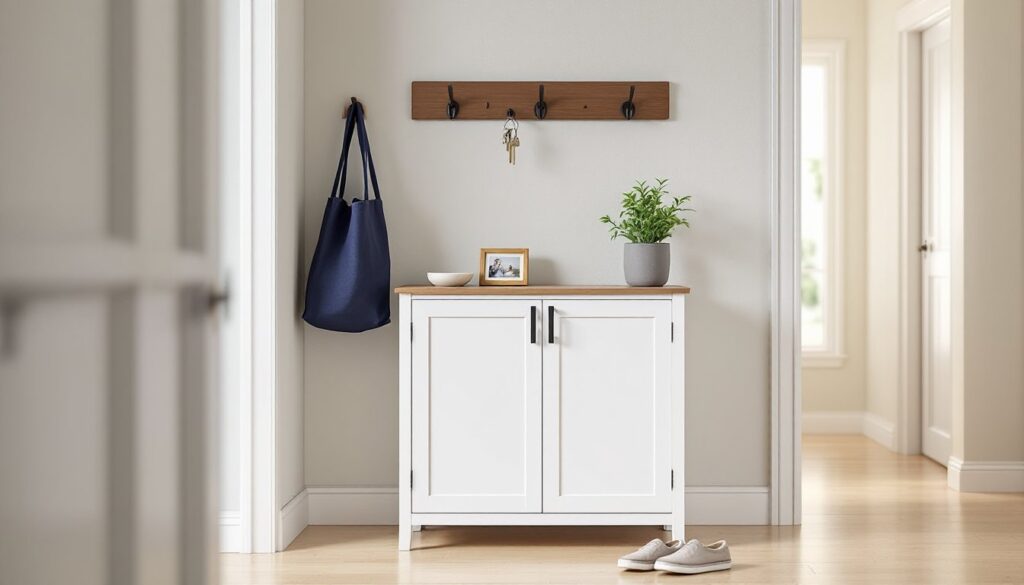
The entryway sets the tone for the entire home. It’s where keys get dropped, shoes pile up, and mail lands in chaotic stacks. A well-chosen cabinet can turn that high-traffic zone from a dumping ground into an organized, welcoming space. Whether working with a cramped apartment corridor or a spacious foyer, the right entryway cabinet delivers storage, style, and sanity. This guide covers practical cabinet designs, styling tips, and DIY builds that anyone with basic woodworking skills can tackle.
Table of Contents
ToggleKey Takeaways
- An entryway cabinet prevents clutter from spreading through your home by providing dedicated storage for keys, mail, shoes, and seasonal items right at the door.
- Wall-mounted cabinets that are 8–10 inches deep and mounted 30–36 inches high are ideal for narrow entryways, maximizing storage without blocking foot traffic.
- Multi-functional entryway cabinet designs with integrated seating, hooks, and soft-close hinges create a transition zone that handles both storage and daily routines efficiently.
- Interior organization with matching bins, clear containers, and proper labeling keeps your entryway cabinet functional and intentional-looking, even behind closed doors.
- DIY entryway cabinet projects using basic tools like a circular saw, drill, and simple butt joints are achievable for beginners, with secure wall-stud installation being essential for safety.
- Styling the cabinet top using the rule of thirds—one-third functional items, one-third decorative, and one-third open space—prevents visual clutter and creates a curated appearance.
Why an Entryway Cabinet Is Essential for Your Home
An entryway cabinet solves the clutter problem at the source. Without dedicated storage near the door, belongings migrate to countertops, stairs, and wherever there’s horizontal space.
Functional benefits include:
- Hidden storage for seasonal items like hats, gloves, and scarves
- Surface space for keys, wallets, and phones
- Visual barrier that conceals shoes and bags from sight lines into the main living area
- Dust control by keeping outdoor gear contained
Cabinets with closed doors prevent visual clutter from overwhelming small spaces. Open shelving works in larger foyers but requires consistent maintenance to avoid looking messy.
From a property value perspective, built-in or well-integrated cabinetry reads as intentional design rather than afterthought furniture. It signals attention to detail, something potential buyers notice during walkthroughs.
Slim Console Cabinets for Narrow Entryways
Narrow entryways demand furniture that doesn’t block foot traffic. Standard console tables run 12–18 inches deep, but cabinets with doors need clearance for swing radius.
Wall-mounted cabinets are the smartest choice for tight spaces. Mounting at 30–36 inches off the floor creates storage without eating floor area. Look for units 8–10 inches deep, just enough for mail, sunglasses, and dog leashes.
Vertical storage maximizes limited square footage. Tall, narrow cabinets (12 inches wide, 72 inches high) fit beside doorways and hold surprising amounts. Stack interior shelves 10–12 inches apart for shoe boxes or folded totes.
Furniture considerations:
- Ensure cabinet doors open fully without hitting walls or adjacent furniture (measure the swing arc before buying)
- Choose hinges that allow at least 90-degree opening in confined areas
- Consider pocket doors or sliding barn-style hardware if standard hinges won’t work
- Verify that baseboards and crown molding won’t interfere with installation
Shallow cabinets won’t hold bulky winter coats, but paired with wall hooks above, they handle everyday essentials without crowding the walkway.
Storage-Focused Cabinet Designs for Busy Families
Families with kids need serious storage, not decorative displays. The goal is containing the daily avalanche of backpacks, sports gear, and shoes before it spreads through the house.
Locker-style cabinets assign each family member a dedicated compartment. Individual cubbies (12–15 inches wide) with hooks, shelves, and bins keep belongings separated. Label each section to enforce the system.
Shoe storage solutions include:
- Pull-out drawers with ventilated slats (prevents odor buildup)
- Tilt-out bins at baseboard level (hides 4–6 pairs per bin)
- Adjustable shelving angled at 15 degrees (shoes don’t slide forward)
Mudroom-style cabinets work even in small entryways if they’re floor-to-ceiling. A 24-inch-wide, 84-inch-tall cabinet provides more cubic storage than low, sprawling furniture.
Material durability matters in high-traffic areas. Hardwood plywood with laminate interiors withstands daily abuse better than particleboard. Soft-close hinges prevent door slamming (especially important with kids). Sealed or painted finishes are easier to wipe down than raw wood.
Bottom cabinets should sit on a recessed toe kick (3–4 inches deep, 3–4 inches high) so users can stand flush against the unit without stubbing toes or scuffing cabinet fronts.
Multi-Functional Cabinets With Seating and Hooks
Combining storage with seating turns an entryway into a functional transition zone. Bench-height cabinets (18 inches tall) let people sit while putting on shoes.
Bench cabinet construction requires sturdy framing to support weight. The cabinet top should be ¾-inch plywood minimum, ideally with cross bracing underneath every 16–24 inches. Upholstered cushions add comfort, but they trap dirt, consider removable, washable covers.
Integrated hooks and rails above the cabinet keep coats accessible without requiring separate wall installation. Mount coat hooks 60–66 inches from the floor for adult use, or install a double rail with kid-height hooks at 42–48 inches.
Many budget-friendly modifications repurpose existing furniture into entryway cabinets with added hooks and seating, especially by adapting low bookshelves or storage benches.
Design considerations:
- Ensure the seat depth is at least 15 inches for comfortable sitting
- Avoid placing hooks directly over the seating area (coats will drape onto people)
- Add a lip or backstop along the rear edge of the bench to prevent items from sliding off
If the entryway opens directly into a living area, use the cabinet as a visual divider. A 36–42 inch tall unit with seating provides storage without completely blocking sightlines.
Styling Your Entryway Cabinet for Maximum Impact
A well-styled cabinet feels intentional rather than cluttered. The goal is balancing function with a curated look.
Top surface styling should follow the rule of thirds:
- One-third functional (key tray, mail sorter)
- One-third decorative (small plant, framed photo, or seasonal decor)
- One-third open space (prevents visual crowding)
Avoid covering the entire surface. Leave at least 30% bare so the cabinet doesn’t look like a yard sale.
Interior organization matters even behind closed doors. Use matching bins or baskets to corral small items. Clear containers work for frequently accessed items (sunglasses, charging cables), while opaque boxes hide visual clutter.
Lighting upgrades the cabinet from furniture to feature. Battery-operated LED puck lights mounted inside upper cabinets illuminate contents without requiring electrical work. For surface lighting, a small table lamp (12–16 inches tall) adds warmth without overwhelming the space.
Hardware and finish should complement existing trim and fixtures. Brushed nickel, matte black, or oil-rubbed bronze handles match most homes. If the cabinet finish doesn’t match surrounding woodwork, paint can unify the palette, semi-gloss or satin sheen holds up better than flat paint in high-touch areas.
Mirrors mounted above cabinets expand tight entryways visually and provide a last-minute check before heading out the door.
DIY Entryway Cabinet Projects You Can Build This Weekend
Building a custom entryway cabinet doesn’t require advanced woodworking skills. With basic tools and a free weekend, most DIYers can complete a functional piece.
Skill level: Beginner to Intermediate
A simple entryway cabinet with hooks can be built using nominal 1×12 pine boards (actual dimensions 11¼ inches wide) and basic butt joints secured with wood glue and 1¼-inch finish nails.
Tools needed:
- Circular saw or miter saw (miter saw produces cleaner cuts on trim)
- Drill/driver with bits
- Level (24-inch minimum)
- Tape measure
- Square
- Sandpaper or orbital sander
Materials for a basic 36-inch-wide cabinet:
- Three 1×12 boards at 8 feet (cut to size for sides, top, bottom, shelves)
- Two 1×4 boards for face frame
- Two overlay cabinet doors (pre-made or built from ¾-inch plywood)
- Four hinges (European cup hinges simplify installation)
- Magnetic catches or soft-close hardware
- Wood glue, finish nails, wood filler
- Primer and paint or stain
Assembly steps:
- Cut all pieces to length, double-check measurements before cutting.
- Assemble the cabinet box using glue and nails. Predrill nail holes in hardwood to prevent splitting.
- Attach a simple face frame using pocket screws or biscuit joints.
- Install adjustable shelf pins (drilling jig keeps holes aligned).
- Mount hinges and hang doors, adjust until gaps are even.
- Fill nail holes, sand smooth (120-grit, then 220-grit), prime, and paint.
- Secure the cabinet to wall studs using 3-inch wood screws through the back panel or French cleat system.
For more detailed workshop project guides, refer to sites that walk through cutting lists, assembly sequences, and finishing techniques.
Safety reminders:
- Wear safety glasses when cutting and drilling
- Use hearing protection with power saws
- Apply primer and paint in a well-ventilated area
- Secure cabinets to wall studs (especially important in homes with children, tip-over hazard)
Wall anchors alone won’t hold a loaded cabinet. Locate studs with a stud finder and use appropriate fasteners for your wall type (drywall, plaster, or masonry).
Conclusion
An entryway cabinet transforms a chaotic drop zone into an organized, functional space that works as hard as the people using it. Whether installing a slim wall-mounted unit, building a custom bench with storage, or repurposing existing furniture, the right cabinet setup makes daily routines smoother and keeps clutter contained where it starts, at the door.