Galley kitchens, those long, narrow corridors flanked by counters and cabinets, often get a bad reputation. Too cramped, too dark, too inefficient. But here’s the truth: a well-planned galley kitchen can outperform sprawling layouts in both function and flow. Whether you’re working with 8 feet of clearance or 12, the key isn’t adding square footage, it’s making every inch count. This guide walks through practical remodel ideas that address real pain points: storage that actually works, lighting that doesn’t leave corners in shadow, and layout tweaks that turn tight quarters into a lean, efficient workspace.
Table of Contents
ToggleKey Takeaways
- Well-planned galley kitchen remodels follow the professional work triangle layout and can outperform larger kitchens by maximizing efficiency without costly structural changes.
- Install under-cabinet LED lighting on both runs and use light-colored cabinets (white, pale gray, or greige) to eliminate shadows and prevent the space from feeling cramped like a hallway.
- Upgrade to space-saving appliances—such as 24-inch ranges, 18-inch dishwashers, or drawer-style models—and reduce cabinet depth to 21 inches on one side to gain usable floor clearance.
- Maximize storage vertically with full-extension drawer glides, toe-kick drawers, and cabinets stacked to the ceiling rather than leaving dust-collecting gaps above.
- Most galley kitchen remodel projects are cosmetic (new cabinets, countertops, lighting, and paint) and recoup 70–80% of costs at resale while taking only 2–4 weeks to complete.
- Run flooring parallel to the galley’s length and keep the backsplash simple with light subway tile to visually elongate the space and prevent it from feeling chopped up.
Why Galley Kitchens Are Worth the Remodel
Galley kitchens follow the classic work triangle, sink, stove, refrigerator, without the wasted steps of larger layouts. Everything sits within arm’s reach, which is why professional kitchens often use galley or parallel configurations. The problem isn’t the footprint: it’s outdated finishes, poor lighting, and cabinetry that doesn’t maximize vertical or corner space.
A remodel lets homeowners address these issues without moving walls or rerouting plumbing. Most galley upgrades focus on surface-level improvements, new cabinets, countertops, lighting, and paint, that don’t require structural permits. That keeps costs manageable and timelines short, typically 2–4 weeks for a full cosmetic remodel.
The return on investment is strong. According to kitchen renovation cost estimates, minor kitchen remodels recoup 70–80% of their cost at resale, and galley kitchens in condos or older homes often see even higher returns because they’re common pain points for buyers. A fresh, functional galley signals that the rest of the home has been maintained.
Smart Layout Strategies to Maximize Space
Start by measuring the clearance between opposing cabinets or appliances. The International Residential Code (IRC) recommends a minimum of 42 inches for single-cook kitchens and 48 inches if two people will work simultaneously. Anything less feels cramped: anything over 54 inches wastes steps.
If the galley ends at a window or exterior door, consider extending the counter along that wall to create an L-shaped terminus. This adds 12–18 inches of usable counter space and breaks up the tunnel effect. If the galley opens to a dining or living area, removing upper cabinets on one side, especially near the opening, creates visual flow and prevents the space from feeling like a hallway.
Relocating appliances can make a big difference. Swapping a 30-inch range for a 24-inch slide-in model frees up counter space without sacrificing burners. Moving the refrigerator to the end of the run (rather than mid-galley) improves traffic flow and lets you open the door fully without blocking the aisle. Note: moving gas lines or 240V circuits requires a licensed electrician or plumber and often a permit.
If the galley has a door mid-run, resist the urge to close it off unless it’s truly redundant. Instead, replace it with a pocket door or remove the door and casing to gain 3–4 inches of clearance. Small moves like this add up.
Cabinet and Storage Solutions for Galley Kitchens
Standard base cabinets are 24 inches deep, but galley kitchens benefit from 21-inch-deep cabinets on one side. This adds 3 inches of floor clearance, enough to make a narrow kitchen feel noticeably less tight. You’ll lose some storage, so compensate by going vertical: stack cabinets to the ceiling rather than leaving a dust-collecting gap.
Use full-extension drawer glides (rated for 75–100 lbs) in base cabinets. Unlike traditional shelves, drawers let you access items at the back without kneeling or excavating. Install a drawer bank instead of a false front below the sink: most undermount sinks allow a shallow tip-out tray for sponges and scrubbers.
Corner cabinets in galley kitchens are tricky. If you have an L-shaped end, use a lazy Susan or LeMans-style pull-out to access the blind corner. If the galley is straight, skip corner cabinets entirely and use open shelving or a narrow pantry pullout (6–9 inches wide) to fill the gap.
Consider open shelving on one upper run, especially near a window. It reduces visual bulk and forces you to keep everyday items tidy. Use 12-inch-deep floating shelves anchored into studs with heavy-duty brackets rated for 50+ lbs. Open shelving isn’t for everyone, but in a galley it can prevent the space from feeling like a cave.
Don’t ignore toe kicks. A toe-kick drawer (4 inches tall) fits baking sheets, cutting boards, or flat items that otherwise clutter counters. These require custom fabrication or aftermarket kits, but they’re easy to retrofit during a remodel.
Color Schemes and Lighting to Open Up Your Kitchen
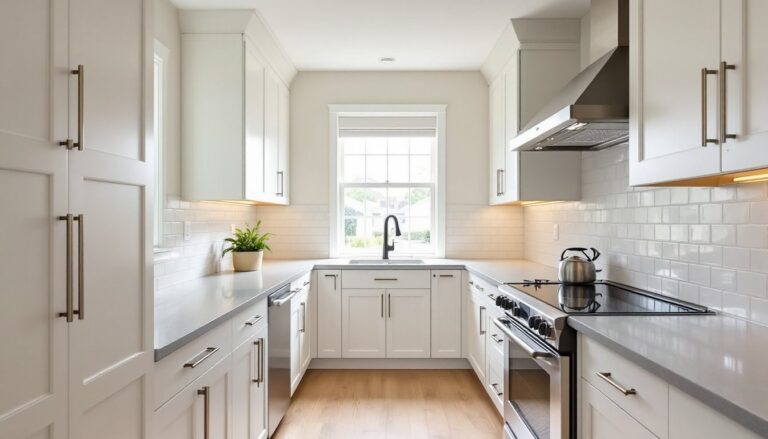
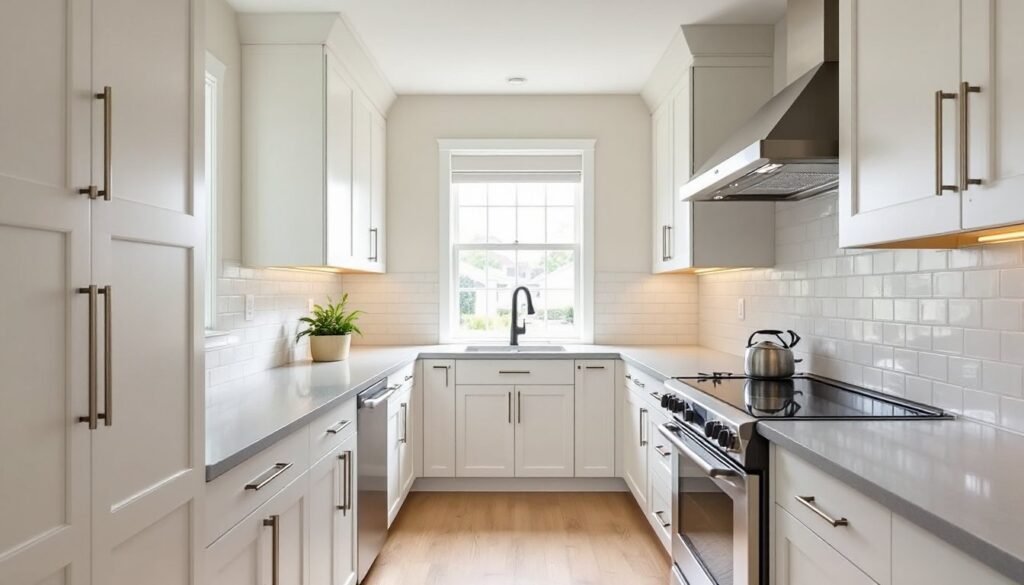
Dark galley kitchens feel like hallways. Light ones feel like workspaces. That’s not opinion, it’s optics. Use white or light-neutral cabinets (off-white, pale gray, greige) on both sides to reflect light. If you want contrast, add it through countertops, backsplash, or lower cabinets only. Painting uppers dark closes in the space.
For walls, choose satin or semi-gloss paint in whites or soft warm tones. Flat paint absorbs light: sheen bounces it. A gallon of quality paint covers roughly 350–400 square feet: most galley kitchens need 2 gallons or less for walls and ceiling.
Lighting is non-negotiable. A single overhead fixture leaves counters in shadow. Install under-cabinet LED tape lights or puck lights on both runs. LED tape costs $15–30 per 16-foot roll, draws minimal power, and mounts with adhesive or clips. Hardwire them to a wall switch or use plug-in kits if you’re not opening walls.
Replace any flush-mount ceiling fixture with a semi-flush or pendant that sits 12–18 inches below the ceiling. This drops the light source closer to work surfaces. If the ceiling is 8 feet or lower, stick with semi-flush to avoid head clearance issues. Add a pendant over the sink if there’s a window, it’s a small detail that layers light and adds personality.
If your galley is windowless, get creative. A frosted glass upper cabinet door with an interior LED strip mimics the glow of a window. Or install a tubular skylight (Sun Tunnel, Solatube) if there’s attic access above. These funnel daylight through a reflective tube and diffuser, and many design resource sites feature case studies showing their impact in narrow kitchens.
Countertop and Appliance Choices That Save Space
Countertop depth matters. Standard counters are 25 inches deep (24-inch cabinet plus 1-inch overhang). In tight galleys, reducing the overhang to ½ inch or using a 21-inch-deep counter on one side buys breathing room. Pair this with a flush-mount or undermount sink to maximize usable surface area.
Choose materials that don’t overwhelm. Quartz and solid-surface counters come in light, uniform colors that keep the eye moving. Busy granite or dark slabs chop the space visually. Butcher block works if you maintain it, and it’s repairable, something to consider in a high-use kitchen. Expect to pay $40–100 per square foot installed for quartz, $30–70 for solid surface, and $50–150 for granite, depending on region and edge profile.
Appliances are where you reclaim real estate. Swap a 30-inch range for a 24-inch model (available from brands like Bertazzoni, Summit, or Avanti) to gain 6 inches of counter. Replace a full-size dishwasher with an 18-inch model if you’re a small household. Consider a drawer-style dishwasher (single or double) that fits under a standard 36-inch counter and doesn’t require door clearance in front.
If you’re keeping a full-depth refrigerator, box it in with cabinetry or place it at the galley’s end so it doesn’t jut into the aisle. Counter-depth refrigerators (24–27 inches deep) sit flush with cabinets and cost $1,800–4,000, but they reduce capacity by 20–30%. Weigh that trade-off honestly.
Microwave placement is a puzzle. Over-the-range microwaves save counter space but require a 120V outlet and ducted or recirculating vent. Mounting a microwave in an upper cabinet (using a trim kit) is another option, though you’ll lose storage. A mobile home kitchen layout often uses a similar strategy for compact appliance integration.
Flooring and Design Details That Make an Impact
Run flooring parallel to the length of the galley. This elongates the space visually and reduces cuts. Luxury vinyl plank (LVP) is durable, water-resistant, and DIY-friendly: it costs $2–7 per square foot and installs as a floating floor over most substrates. Porcelain tile (12×24-inch planks or larger) is another option, especially if you’re tiling the backsplash and want a cohesive look. Avoid small mosaics or busy patterns on the floor, they make a narrow kitchen feel chopped up.
Keep the backsplash simple and light. White subway tile (3×6-inch) is classic for a reason: it reflects light, pairs with any cabinet color, and costs $5–15 per square foot installed. For a cleaner look, run tile to the ceiling rather than stopping at the upper cabinets. This eliminates the grease-prone gap and makes the walls feel taller.
Hardware and fixtures are small investments with outsized impact. Swap bulky cabinet knobs for sleek bar pulls (3–5 inches) in brushed nickel, matte black, or brass. Match your faucet finish to the pulls. A high-arc pull-down faucet with a magnetic docking sprayer is easier to use in a tight space than a side-spray model.
If the galley has a window, keep window treatments minimal. A simple roller shade or café curtain filters light without adding visual weight. Skip heavy valances or drapes.
Finally, add one intentional focal point, a bold backsplash behind the range, a contrasting island end panel if you have an L-terminus, or a statement pendant over the sink. One strong element grounds the design. Any community of kitchen enthusiasts will tell you that restraint is the hardest skill to learn, but it’s what separates a cohesive remodel from a cluttered one.
Conclusion
A galley kitchen remodel isn’t about fighting the footprint, it’s about making it work harder. Thoughtful layout tweaks, smart storage, and cohesive finishes turn a narrow corridor into a space that’s efficient, bright, and genuinely pleasant to cook in. Start with the structural stuff (layout, lighting), then layer in finishes that suit your style and budget. Most importantly, be realistic about what you can DIY and where a pro makes sense. The result is a kitchen that earns its square footage.