Tile choice can make or break a fireplace redesign. Whether you’re updating a dated brick surround or starting from scratch, the right tile elevates the entire room, adding texture, color, and a focal point that draws the eye. Unlike paint or wallpaper, fireplace tile must handle heat, moisture, and daily wear while looking sharp for decades. This guide covers classic, bold, natural, and modern tiling ideas, plus practical installation tips to help homeowners tackle this high-impact project with confidence.
Table of Contents
ToggleKey Takeaways
- Fireplace tiling ideas require choosing durable, heat-resistant materials like porcelain or ceramic that handle temperature swings, soot, and daily wear for decades.
- Subway tile remains a timeless, DIY-friendly choice for $8–$15 per square foot, while bold patterned options like encaustic or Moroccan zellige create dramatic statement pieces but demand precision during installation.
- Natural stone tiles including marble, slate, and travertine add organic texture and warmth but need sealing, careful heat-distance consideration, and extra care during layout to avoid uneven surfaces.
- Modern minimalist fireplace designs use large-format porcelain slabs, matte finishes, and minimal grout lines to create seamless, gallery-like backdrops that let the fire become the focal point.
- Proper surface prep with cement board on drywall or cleaning existing masonry, combined with 48–72 hour thinset curing before grouting, ensures professional-looking results that last.
- Always verify local building codes and fireplace manufacturer clearance requirements (typically 6 inches to sides, 12 inches above for wood-burning units) before beginning any installation.
Why Tile Choice Matters for Your Fireplace
Fireplaces endure temperature swings, soot, and occasional impact, conditions that rule out many decorative materials. Tile offers durability, heat resistance, and near-endless design flexibility. Choosing the right type affects both aesthetics and longevity.
Porcelain and ceramic tiles are workhorses for fireplace surrounds. Porcelain withstands higher heat and resists moisture better than ceramic, making it ideal for gas or wood-burning units. Ceramic works fine for decorative surrounds on electric fireplaces or mantels that don’t see direct flame exposure.
Natural stone tiles, like marble, slate, or travertine, bring organic texture and color variation. They require sealing to resist staining and may crack under extreme thermal shock if installed too close to the firebox opening. Always check manufacturer heat-tolerance ratings.
Glass tiles reflect light beautifully but are best reserved for areas away from direct heat. Use them on the mantel shelf backing or outer surround edges, not within 6 inches of the firebox.
Code and clearance: The International Residential Code (IRC) requires non-combustible materials within certain distances of the firebox. Typical clearances are 6 inches to sides and 12 inches above for wood-burning units: consult local building codes and the fireplace manufacturer’s specs. If you’re retiling an existing masonry or metal fireplace, you’re usually fine. New installations or structural changes often require permits.
Classic Subway Tile Fireplace Designs
Subway tile remains a go-to for homeowners who want timeless appeal without fuss. The standard 3×6-inch format works in nearly any room style, from farmhouse to mid-century modern.
Traditional white subway with dark grout: This high-contrast look adds definition and hides soot or ash residue better than white grout. Use ¼-inch unsanded grout joints for a crisp, uniform grid. Pair with a simple wood or stone mantel to keep the focus on clean lines.
Vertical stack bond: Instead of the classic running bond (brick pattern), stack tiles vertically for a contemporary twist. This elongates the fireplace visually and suits narrow surrounds or floor-to-ceiling installations.
Beveled or handmade subway: Beveled edges catch light and add subtle dimension. Handmade or artisan subway tiles introduce slight size variations and glaze pooling, giving the surround a custom, less cookie-cutter feel.
Color options: Soft sage, charcoal, or navy subway tiles offer personality without overwhelming the space. Stick to matte or satin finishes: high-gloss can look dated and shows fingerprints near the hearth.
Subway tile is forgiving for DIYers. Its rectangular shape is easy to cut with a wet tile saw or manual snap cutter, and the regular grid makes layout straightforward. Budget $8–$15 per square foot for quality ceramic subway tile, plus adhesive and grout.
Bold Patterned Tile Options
Patterned tile turns the fireplace into a statement piece. Geometric, encaustic, and Moroccan-inspired designs work especially well in living rooms with neutral furniture, where the surround can anchor the color palette.
Encaustic cement tiles: These feature vibrant, layered patterns, florals, stars, or quatrefoils. Cement tiles are porous and must be sealed with a penetrating sealer before grouting and again annually. They’re not suitable for wood-burning fireboxes due to heat sensitivity: reserve them for gas or electric units with lower surface temps.
Geometric porcelain: Hexagons, diamonds, and chevrons in contrasting colors create visual movement. A black-and-white hex pattern pairs beautifully with brass or matte-black fireplace doors. Large-format geometric tiles (8×8-inch or larger) reduce grout lines and speed installation.
Moroccan zellige: Hand-cut zellige tiles have an undulating surface and rich glazes in jewel tones, emerald, cobalt, terracotta. The irregular edges and slight color shifts give a collected, artisan look. Expect to pay $25–$50 per square foot and plan for longer installation time due to the hand-laid nature.
Layout tip: Center the boldest pattern element on the fireplace opening. Dry-lay the first few rows to ensure symmetry before setting tile in thinset mortar. Patterned tile is less forgiving of misalignment than solid-color options, so use tile spacers religiously.
Bold patterns shine when the rest of the room stays simple. If you have patterned rugs, busy artwork, or loud upholstery, dial back the tile choice or limit the pattern to a feature band rather than the full surround.
Natural Stone and Marble Fireplace Styles
Natural stone brings warmth, depth, and a connection to the outdoors. Each slab or tile is unique, so no two installations look identical.
Stacked stone veneer: Thin ledgestone or stacked stone panels create a rustic, cabin-like aesthetic. Install them over cement board backer using Type S mortar or a compatible adhesive. No grout is needed between stones, just tight joints. Stacked stone works well floor-to-ceiling and pairs with reclaimed wood mantels.
Marble slab or tile: Carrara, Calacatta, and Statuario marbles offer classic elegance with gray or gold veining. Book-matched slabs, where two slabs are mirrored at the center, create a dramatic, high-end look. Marble is softer than granite and can etch from acidic cleaners: seal it with an impregnating sealer and wipe spills quickly.
Slate tile: Slate’s natural cleft surface and earthy tones (charcoal, rust, sage) suit Craftsman and contemporary homes. It’s durable and heat-resistant. Use ⅛- to ¼-inch grout joints and a dark grout to blend with the stone’s color variation.
Travertine: This limestone has a pitted, textured surface and warm beige to walnut hues. Filled travertine (where pits are filled with resin) is easier to clean: unfilled travertine has more character but collects dust. Both need sealing.
Natural stone tiles vary in thickness. Check each piece and apply extra thinset to the backs of thinner tiles to achieve a flat plane, a technique called back-buttering. A ⅜×⅜-inch square-notch trowel works for most stone tile applications. Cutting natural stone requires a wet saw with a diamond blade: the dust is heavy, so wear a respirator rated for silica.
Many homeowners appreciate the insights shared by renovation experts featured on design and remodeling shows, which often showcase natural stone installations in period homes.
Modern Minimalist Tile Approaches
Minimalist design strips away ornament and emphasizes material honesty, clean lines, and negative space. Fireplace tile in this style often features large formats, monochromatic palettes, and seamless transitions.
Large-format porcelain slabs: 24×48-inch or 36×36-inch tiles reduce grout lines to near invisibility. Install them with rectified edges (precisely cut, square edges) and ⅟₁₆-inch joints for a nearly seamless look. Use a leveling system (clips and wedges) to prevent lippage between tiles. These slabs are heavy: have a helper on hand and use a suction cup tile lifter.
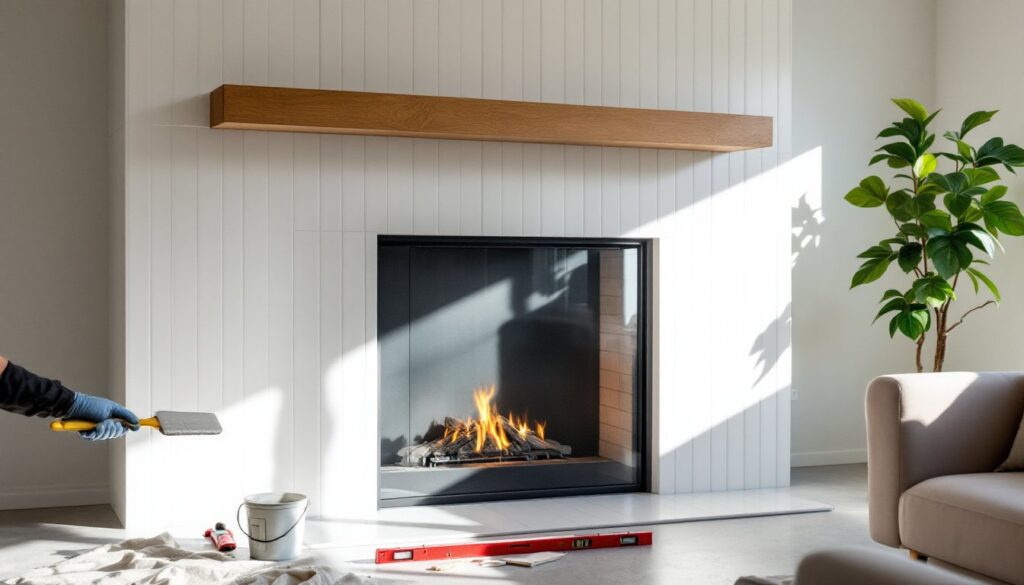
Matte black or concrete-look tile: Black porcelain or concrete-effect tiles create a monolithic, gallery-like backdrop. Pair with a floating wood mantel or no mantel at all. Keep the hearth extension minimal, just enough to meet code, and use the same tile on the floor for continuity.
White or light gray with minimal grout: Pure white or pale gray tiles in a stacked bond or grid pattern fade into the wall, letting the fire become the focal point. Use white or light gray grout in the smallest joint width the tile allows. This approach works especially well in Scandinavian or Japanese-inspired interiors.
Textured relief tile: Some modern tiles feature subtle 3D patterns, linear grooves, waves, or hexagonal debossing, that add interest without color. Install them in a single orientation for rhythm or rotate them for a dynamic effect.
Minimalist doesn’t mean cheap. Quality large-format porcelain runs $10–$30 per square foot, and installation is more demanding than smaller tiles. If you’re new to tiling, practice on a small accent wall first or hire a pro for the fireplace and tackle simpler projects yourself.
Tips for Installing Fireplace Tile Like a Pro
Fireplace tiling is manageable for intermediate DIYers, but prep and precision matter more than speed.
Surface Prep
- New construction or drywall: Install ½-inch cement board (like HardieBacker or Durock) over studs using 1¼-inch cement board screws spaced 8 inches on-center. Tape seams with fiberglass mesh tape and thinset.
- Existing masonry or brick: Clean thoroughly, removing soot, efflorescence, and loose mortar. If the surface is uneven, apply a skim coat of thinset to level it, then let cure 24 hours.
- Metal fireplace surrounds: Some zero-clearance units have metal faces. Check if the manufacturer allows tiling over the metal: if so, roughen the surface with 80-grit sandpaper and use a polymer-modified thinset for better adhesion.
Layout and Cutting
- Dry-lay the tile on the floor in the same configuration as the fireplace. Adjust grout joint width to avoid thin slivers at edges.
- Mark a level reference line across the surround at the mantel height or midpoint. Use a 4-foot level and chalk line.
- Cut tiles with a wet saw for straight cuts, a tile nipper for small notches, and a grinder with diamond blade for curves (like around arched fireboxes).
Adhesive and Grouting
- Use modified thinset mortar rated for heat exposure (check the label for “high-heat” or “fireplace” designation). Mix to peanut-butter consistency.
- Apply thinset with the appropriate notched trowel for your tile size: ¼×¼-inch for mosaics, ⅜×⅜-inch for subway or 12×12-inch tiles.
- Press tiles with a slight twist to embed them. Check for full coverage by pulling up a tile, 95% of the back should be coated.
- Let thinset cure 48–72 hours before grouting. Use unsanded grout for joints ⅛ inch or smaller, sanded grout for larger joints.
- Apply grout with a rubber float at a 45-degree angle, then wipe diagonally with a damp sponge. Buff haze with a microfiber cloth after 20 minutes.
Safety and Code
- Wear safety glasses, dust mask, and gloves when cutting tile. Wet saws throw a mist: work outdoors or in a well-ventilated garage.
- Maintain required clearances from the firebox. If uncertain, consult the fireplace manual or hire a CSIA-certified chimney inspector.
- If the project involves gas or electrical work (e.g., relocating a gas line or adding built-in lighting), pull permits and hire licensed tradespeople.
For additional tile layout techniques and design inspiration, many homeowners turn to trusted home improvement resources. Professional guidance on complex patterns or structural concerns can be found through experienced remodeling contractors in your area.
Tool checklist: Wet tile saw, notched trowel, rubber float, 4-foot level, tape measure, chalk line, tile spacers, mixing paddle and drill, sponges, buckets.
Conclusion
Fireplace tile transforms a functional element into a design centerpiece. Whether you lean toward classic subway, bold patterns, natural stone, or sleek minimalism, the key is matching material to heat exposure, prepping surfaces correctly, and executing clean layout and grouting. With the right tile and a methodical approach, homeowners can achieve a professional-looking surround that anchors the room for years to come.