Turning a bland living room into a space with personality doesn’t require an interior designer’s budget or contractor-level skills. Most homeowners already have the tools needed for quick, budget-conscious decor upgrades, a drill, paintbrushes, measuring tape, and a willingness to get hands-on. The difference between a generic rental-grade room and one that feels intentional often comes down to a weekend’s worth of simple projects. Whether it’s repurposing furniture that’s seen better days, building custom shelving from dimensional lumber, or swapping out builder-grade light fixtures, small-scale DIY work delivers outsized visual impact without the four-figure invoice.
Table of Contents
ToggleKey Takeaways
- DIY living room decor projects can reduce costs by 50–80% compared to hiring contractors, with custom shelving running $200–$400 in materials versus $2,000–$5,000 installed.
- Gallery walls and upcycled furniture transformations are achievable weekend projects that create significant visual impact without requiring professional skills or expensive tools.
- Floating shelves, custom lighting, and textile projects can be customized to exact specifications and completed on your timeline without waiting for contractor availability.
- Budget-friendly wall art alternatives include framing fabric remnants, stretching canvas over DIY stretcher bars, and creating dimensional wood art using pallet slats and salvaged materials.
- Always prioritize safety by wearing protective gear (safety glasses, N95 masks, and respirators when needed) and checking for electrical wiring and plumbing before drilling into walls.
- Furniture refinishing with proper surface prep—including cleaning with TSP, sanding, and applying quality primers and finishes—transforms dated pieces with minimal material costs.
Why DIY Decor Is the Smart Choice for Your Living Room
Hiring out every decorating task quickly balloons a budget. A single custom built-in can run $2,000–$5,000 installed, while the materials for a DIY version might cost $200–$400 in lumber and hardware. Labor markups typically double or triple material costs, which means homeowners paying retail rates fund someone else’s saw collection.
Beyond cost, DIY gives control over timing and customization. Contractors book weeks or months out: a motivated homeowner can knock out a gallery wall installation or furniture refinish in a single Saturday. Custom sizing becomes straightforward, shelving fits exactly where needed, paint colors match without waiting for samples, and project pivots don’t require renegotiating a contract.
There’s also the practical skill-building angle. Learning to cut miters for picture frames or apply furniture wax translates to future projects. Each completed task builds confidence for the next, turning intimidating renovations into manageable sequences of smaller jobs.
Safety note: Always wear safety glasses when cutting, drilling, or sanding. A dust mask (N95 or better) is non-negotiable for sanding painted surfaces or MDF, which produces fine particulate that irritates lungs.
Budget-Friendly Wall Art and Gallery Wall Ideas
Empty walls read as unfinished space, but filling them with store-bought art gets expensive fast. DIY alternatives start with framing fabric remnants, vintage maps, or even wallpaper samples in thrift-store frames. A 12×16-inch frame costs $5–$15 at discount stores: spray-paint the frame matte black or brushed gold for a cohesive look.
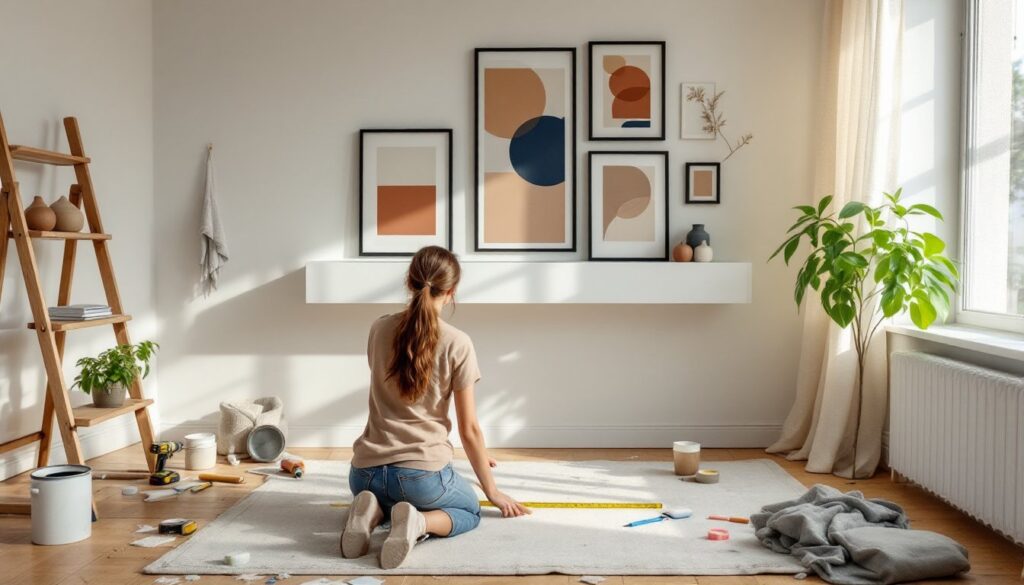
Gallery wall layout requires planning. Lay frames on the floor first, arranging them until the composition feels balanced. Measure the outer dimensions of the entire grouping, then mark the wall’s center point. Hang the center piece first, working outward. Use a laser level ($20–$40) or a smartphone level app to keep horizontal rows aligned. Picture-hanging strips (3M Command, for example) work for frames under 5 pounds and won’t damage rental walls.
For larger statement pieces, stretch canvas over 1×2 stretcher bars (actual dimensions: 3/4″ × 1-1/2″). Cut bars to size with a miter saw, assemble with wood glue and corner braces, then staple canvas (primed or raw) to the back. Paint abstract shapes, geometric patterns, or even large-scale typography with latex house paint, it’s cheaper than artist acrylics and covers more surface area per dollar.
Another option: create dimensional art by mounting salvaged wood (pallet slats, barn board) onto a plywood backer. Sand surfaces to 120 grit, apply a clear polyurethane or furniture wax, and hang with D-rings and picture wire rated for the frame’s weight. Authentic living room design approaches often layer textures this way, mixing two-dimensional prints with three-dimensional objects.
Upcycled Furniture Projects That Make a Statement
A dated coffee table or hand-me-down bookcase doesn’t need to hit the curb. Furniture refinishing resets aesthetics for the cost of sandpaper and finish. Start by removing hardware (hinges, pulls, knobs). Clean all surfaces with TSP (trisodium phosphate) or a deglosser to remove grime and old wax, which prevents new finish from bonding.
For painted finishes, sand lightly with 120-grit sandpaper to scuff the surface, wipe with a tack cloth, then apply a bonding primer (BIN shellac-based or Zinsser 123). Two coats of satin or semi-gloss latex or acrylic paint follow. A foam roller (4-inch, fine nap) minimizes brush marks on flat surfaces: use an angled brush for edges and detail work. Lightly sand between coats with 220-grit paper for a factory-smooth finish.
For natural wood finishes, strip old varnish with a chemical stripper (wear nitrile gloves and work in a ventilated area), then sand progressively from 80-grit to 220-grit. Apply gel stain for better color control on blotchy woods like pine, or use traditional penetrating oil stain on oak and maple. Seal with three coats of water-based polyurethane (satin or semi-gloss), sanding lightly with 320-grit between coats.
Hardware swaps make a surprising difference. Replacing brass drawer pulls with matte black or brushed nickel costs $3–$8 per pull but modernizes the entire piece. For vintage or boho-inspired aesthetics, leather or rope pulls add texture without looking dated.
Safety: Chemical strippers emit strong fumes. Work outdoors or open all windows and use a respirator with organic vapor cartridges, not just a dust mask.
Creative Textile and Pillow Refresh Projects
Pillows and throws layer color and texture without commitment. Instead of buying new, make custom covers from remnant fabric (home fabric stores sell designer-grade upholstery fabric for $10–$30/yard). A standard 18×18-inch pillow cover requires about 1/2 yard of 54-inch-wide fabric.
Cut two 19×19-inch squares (includes 1/2-inch seam allowance on all sides). Place right sides together, pin, and sew three sides with a 1/2-inch seam using a sewing machine set to straight stitch (2.5mm length). On the fourth side, leave a 12-inch opening. Turn right-side out, press seams flat, insert an 18×18-inch pillow insert (polyester fills cost $5–$12), then hand-stitch the opening closed with a ladder stitch.
For no-sew versions, use fabric glue (Aleene’s Fabric Fusion or similar) along pinned seams, let cure 24 hours, then turn and stuff. It won’t hold up to machine washing, but spot-cleaning works fine.
Textile paint or fabric dye transforms plain cotton or linen. Use fabric screen-printing ink and a homemade stencil (cut from freezer paper with a craft knife) to add geometric patterns or botanicals. Iron the stencil onto the fabric (shiny side down), apply ink with a foam brush or stencil brush, peel while wet, then heat-set per ink instructions (usually a 3-minute iron on high).
Another approach: dip-dyeing throws or curtain panels. Fill a 5-gallon bucket with hot water and fiber-reactive dye (Rit, Dylon), submerge fabric halfway for an ombre effect, let sit per dye instructions, then rinse and wash. Wear rubber gloves: textile dye stains skin and countertops.
Easy DIY Shelving and Storage Solutions
Floating shelves add display space without eating up floor area. Basic construction uses 2×10 or 2×12 lumber (actual dimensions: 1-1/2″ × 9-1/4″ or 11-1/4″) cut to length. For a 48-inch shelf, cut one board, sand all edges with 120-grit, then finish with stain or paint. Mount with heavy-duty floating shelf brackets (rated for 50+ pounds) screwed into wall studs. Use a stud finder to locate framing (typically 16 inches on center in residential construction). If studs don’t align where the shelf needs to go, use toggle bolts or molly bolts rated for the load.
For deeper shelving, build a simple bracket system from 1×2 lumber and L-brackets. Cut two 10-inch uprights and one horizontal shelf support, assemble with wood screws, then mount the bracket assembly to studs. Rest a 3/4-inch plywood or pine board shelf on top. This approach works well in closets, laundry rooms, or mudroom nooks.
Ladder shelves lean against the wall and require no anchoring (though it’s safer to use an anti-tip strap if kids or pets are present). Build from 1×4 and 1×6 boards: two long uprights angled at about 10 degrees from vertical, with stepped shelves (deepest at bottom, shallowest at top) attached with pocket screws. A Kreg Jig ($40–$100) makes pocket-hole joinery easy, drill angled holes on the underside of shelves, then drive 1-1/4-inch pocket screws into the uprights.
Many entertainment center builds rely on modular shelving, mixing open and closed storage for media gear and decorative objects. Custom sizing beats off-the-shelf units that never quite fit.
Safety: When drilling into walls, check for plumbing and electrical with a multi-scanner ($30–$60) before driving screws. Hitting a wire or water line turns a decor project into an emergency repair.
Personalized Lighting Upgrades on a Budget
Builder-grade ceiling fixtures and table lamps flatten a room’s personality. Swapping them is straightforward and doesn’t require an electrician for most tasks.
Pendant light installation over a side table or in a corner starts by turning off power at the breaker (confirm with a non-contact voltage tester, $10–$25). Remove the old fixture, disconnect wires, then connect the new fixture’s black (hot) to black, white (neutral) to white, and bare copper (ground) to the ground screw or green wire. Secure the fixture’s mounting bracket to the electrical box, tuck wires, attach the canopy, install the bulb, and restore power. If the existing box isn’t rated for the new fixture’s weight (most support up to 50 pounds), replace it with a fan-rated pancake box.
For plug-in lamps, update shades and switch out cords. Replace a damaged cord by opening the lamp base, disconnecting the old wires from the socket, threading new 18-gauge lamp cord ($0.50–$1 per foot) through, and reconnecting to the socket terminals (brass screw for hot, silver for neutral). Add a new plug, crimp or solder connections, and reassemble.
DIY lampshades come together with a wire shade frame ($8–$20), fabric, and spray adhesive. Cut fabric 2 inches larger than the frame’s dimensions, spray the frame, smooth fabric onto it, fold and glue edges to the inside, then trim excess. Linen, cotton canvas, and even burlap work well. For drum shades, a self-adhesive shade backing (Styrene or PVC) simplifies the process.
String lights or LED strips add ambient glow. Mount LED tape lights ($15–$40 per 16-foot reel) under floating shelves or behind a TV using the included adhesive backing, then plug into a wall outlet or hardwire to a dimmer switch. Current design trends in lighting favor warm white (2700K–3000K) over cool daylight tones for living spaces.
Safety: Always cut power at the breaker before touching electrical fixtures. If a circuit serves multiple rooms and you can’t isolate the right breaker, hire a licensed electrician. Electrical work done incorrectly is a fire and shock hazard.
Conclusion
Living room decor projects don’t demand professional expertise or unlimited budgets. With basic tools, dimensional lumber, paint, and a methodical approach, homeowners can build shelving, refinish furniture, and install lighting that rivals store-bought or contractor-installed alternatives. The key is choosing projects that match current skill levels, allowing time for surface prep, and not skipping safety gear. Each finished project builds momentum for the next, turning a generic space into one that feels intentional and uniquely personal.