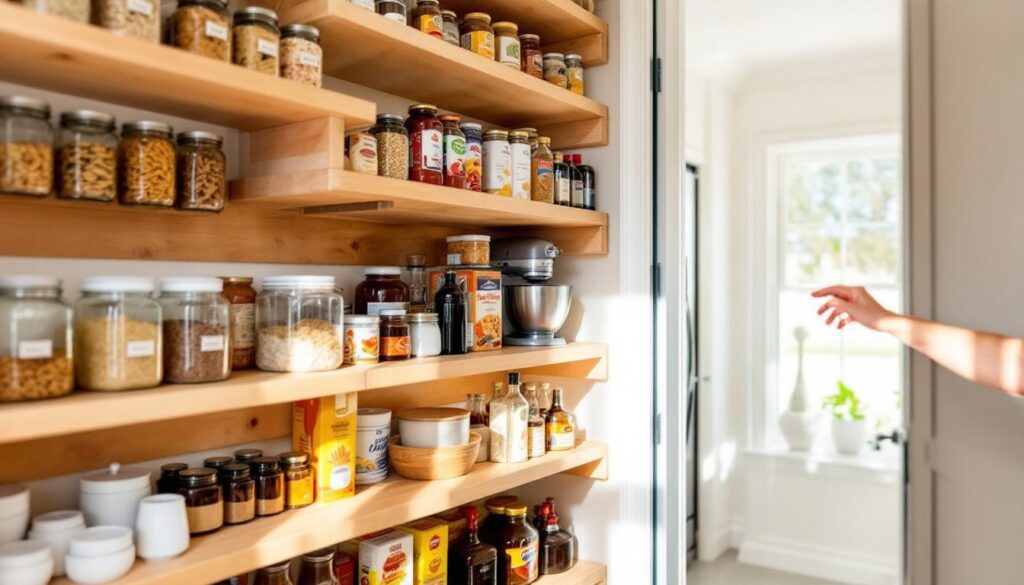
A cluttered pantry with cereal boxes stacked on top of canned goods and spices lost in the back corner isn’t just frustrating, it’s wasted money and time. Custom shelving transforms a chaotic closet into an organized system where every item has its place and nothing expires before you find it. Unlike pre-fab units that force you to work around their fixed heights and generic dimensions, DIY shelving adapts to your pantry’s exact footprint and the way you actually use it. Whether working with a narrow coat-closet conversion or a spacious walk-in, building custom shelves delivers professional results without the contractor bill.
Table of Contents
ToggleKey Takeaways
- DIY pantry shelving ideas save 40–60% compared to pre-fabricated systems while allowing custom measurements, materials, and finishes that match your home’s aesthetic.
- Proper planning—measuring multiple points, locating studs, and spacing shelves based on item heights (14–16 inches for cereal, 10–12 inches for cans, 6–8 inches for spices)—prevents wasted space and ensures functionality.
- Solid wood shelves using ¾-inch plywood and 1×2 cleats provide durable support for 50+ pounds per linear foot at minimal cost, while wire shelving offers flexibility and affordability for renters.
- Stagger shelf heights across both walls in narrow pantries and use pull-out slides or lazy Susan systems to maximize storage in tight spaces and improve access to rear items.
- Mount all shelves directly into studs with 2½-inch screws or heavy-duty anchors, apply protective finishes like semi-gloss paint to resist moisture, and add safety features like front lips to prevent jars from sliding off.
- Start with one wall or section to test your design, then expand—custom pantry shelving improves with iteration as you discover what organization system works best for your household.
Why Custom DIY Pantry Shelving Beats Store-Bought Solutions
Pre-fabricated pantry systems arrive with 12-inch or 16-inch depths and heights determined by someone who’s never seen your kitchen. Custom DIY shelving uses your actual measurements, accommodating everything from bulk cereal containers to small spice jars without wasted vertical space.
Cost savings run 40–60% compared to installed systems. A basic wire closet kit for an 8-foot pantry starts around $150–$200 and offers minimal customization. The same space built with ¾-inch plywood and 1×2 lumber for cleats costs $60–$100 in materials, leaving budget for upgrades like slide-out drawers or pull-down spice racks.
Building your own means choosing materials that match your home’s aesthetic and load requirements. Solid wood shelves support 50+ pounds per linear foot when properly mounted to studs, while many wire racks sag under heavy appliances or jarred goods. You also control finish options, stain, paint, or clear coat, to coordinate with existing cabinetry.
Flexibility extends to future changes. Adding a shelf or adjusting heights takes minutes with DIY systems using adjustable shelf pins or track standards, while modular store-bought units often lock you into fixed configurations.
Measuring and Planning Your Pantry Shelving Layout
Start by measuring width, depth, and height at multiple points, pantries built into older homes rarely have perfectly square walls. Record the narrowest width measurement to ensure shelves fit without forcing.
Locate studs using a stud finder and mark their centers with painter’s tape. Wall-mounted shelving must anchor into studs or use heavy-duty toggle bolts rated for the expected load. Standard stud spacing is 16 inches on center, though 24-inch spacing appears in some construction.
Determine shelf spacing based on what you’re storing. Common pantry items break down as:
- Cereal boxes and bulk containers: 14–16 inches vertical clearance
- Canned goods and jars: 10–12 inches
- Spices and small bottles: 6–8 inches
- Small appliances (mixers, blenders): 18–20 inches
Sketch a side-view elevation showing each shelf height. Avoid uniform spacing, it creates unusable gaps above shorter items. Instead, cluster taller shelves near the bottom for heavy items like bulk flour or canned tomatoes, and shorter shelves up top for lighter goods.
Shelf depth typically runs 12–16 inches for pantries. Shallower depths (10–12 inches) work better for narrow spaces and prevent items from getting lost in back. Deeper shelves (14–16 inches) accommodate larger items but require pull-out baskets or lazy Susans to access rear storage.
Account for door swing clearance, shelves installed too close to the door frame create collision points. Leave at least 2 inches between the deepest shelf edge and the door’s arc.
Budget-Friendly Wood Shelving for Walk-In Pantries
Solid wood shelving delivers strength and a finished appearance for walk-in pantries where aesthetics matter. Pine 1×12 boards (actual dimensions: ¾” × 11¼”) cost $8–$15 per 8-foot length at big-box stores and handle typical pantry loads without sagging when spans stay under 36 inches.
For wider spans or heavier storage, use ¾-inch plywood with a hardwood veneer edge. Cut plywood into 12- or 16-inch-deep shelves, then attach 1×2 edge banding with wood glue and finish nails to hide the ply layers. This method costs less than solid boards for the same width and resists warping better than pine.
Mount shelves using cleats, horizontal support strips screwed directly into studs. Cut 1×2 or 1×3 lumber to the shelf length minus ½ inch, secure it to the wall with 2½-inch wood screws at each stud, then rest the shelf on top. Cleats distribute weight better than brackets and create a clean look without visible hardware.
Many woodworking project plans include cut lists and diagrams for pantry shelving that optimize material use and minimize waste. Standard 4×8 plywood sheets yield six 16-inch-deep shelves with minimal offcuts when planned correctly.
Finishing protects wood from moisture and spills. Apply a coat of primer followed by two coats of semi-gloss paint for easy cleaning, or use polyurethane over stained wood for a natural look. Let each coat cure fully, rushing finish work leads to sticky shelves and smudged paint.
Safety note: Wear safety glasses when cutting, and use a dust mask when sanding. Plywood edges produce fine dust that irritates lungs.
Floating Shelves and Open Shelving Designs
Floating shelves, mounted with concealed brackets or rods, create modern, streamlined pantries without visible supports. They work best for lighter storage (spices, oils, vinegars) and spans under 30 inches.
Build floating shelves using 2×10 or 2×12 boards hollowed to slip over a steel rod or heavy-duty floating shelf bracket anchored into studs. Pre-made floating shelf hardware kits include rods rated for 50–100 pounds per pair, depending on length and wall anchoring.
For a simpler approach, use heavy-duty L-brackets and install them flush with the shelf’s underside, keeping them hidden from the front view. Choose brackets rated for at least 1.5× your expected load, pantry items accumulate weight quickly.
Open shelving in pantries benefits from front lips or rails that prevent jars from sliding off. Attach a ¾-inch × ¾-inch square dowel or decorative trim along the shelf’s front edge with glue and brad nails. This detail costs under $5 per shelf and prevents accidents.
Spacing considerations for open shelving differ from enclosed pantries. Without a door blocking light, open shelves showcase organization, or chaos. Keep frequently used items at eye level (48–60 inches from the floor) and arrange by category or container type.
Paint or stain open shelves to match kitchen cabinetry for a cohesive look. Semi-gloss or satin finishes wipe clean easier than flat paint and resist fingerprints better around high-traffic pantries.
Wire Shelving and Adjustable Track Systems
Wire shelving systems combine affordability with adjustability, ideal for renters or homeowners who expect storage needs to change. Commercial-grade wire shelving (not flimsy closet organizers) supports 200–350 pounds per shelf when properly installed.
Look for shelves with thick gauge wire (10- or 12-gauge) and weight ratings printed on packaging. Cheaper versions use 14- or 16-gauge wire that sags under 30–40 pounds. The difference in cost runs $10–$15 per shelf but matters when storing bulk rice bags or gallon jars.
Wire systems mount to vertical standards (also called uprights or tracks) screwed into studs every 16–24 inches. Adjustable shelf clips lock into slots along the standards, allowing height changes without tools. This flexibility makes wire systems excellent for pantries storing seasonal items or bulk purchases that shift inventory.
Installation tip: Use a 4-foot level when installing vertical standards. Even slight angles compound over shelf length, creating unlevel surfaces where jars roll forward.
Wire shelving’s open construction allows air circulation, helpful for root vegetables like potatoes and onions that need ventilation. But, small items (spice bottles, sauce packets) fall through the gaps. Solve this with shelf liners made from rigid plastic or cut-to-fit acrylic sheets.
Adjustable track systems using metal standards and bracket clips offer similar flexibility with solid shelving. The tracks surface-mount or recess into routed grooves for a cleaner appearance. Brackets rated for pantry use support 75–150 pounds depending on shelf span and material.
Pair metal tracks with wood, wire, or melamine shelves. Melamine-coated particleboard costs $15–$25 per 8-foot length, resists moisture better than raw wood, and requires no finishing. Cut it with a fine-tooth saw blade to prevent chipping the coating.
Corner and Small Space Pantry Solutions
Narrow pantries, those under 30 inches wide, demand creative shelving to maximize every inch. Shallow shelving at 8–10 inches deep works better than standard depths in tight spaces, preventing items from hiding behind each other.
Mount shelves on both side walls of narrow pantries, creating a galley-style layout. Stagger shelf heights on opposite walls so you can see and reach items on both sides without obstruction. This approach often yields 40% more usable storage than single-sided shelving.
Pull-out shelves on full-extension drawer slides transform deep corner cabinets into accessible storage. Build simple plywood boxes on ball-bearing slides rated for 75–100 pounds. Full-extension slides cost $8–$15 per pair and allow the shelf to pull completely out of the cabinet for rear access.
For true corner pantries where two walls meet, use lazy Susan systems or pie-cut shelves. Lazy Susans waste less space than most people think, modern D-shaped or kidney-shaped models maximize corner real estate while maintaining rotation. Many small kitchen solutions incorporate these rotating systems to access corner storage without crawling halfway into the cabinet.
Door-mounted racks add storage without wall space. Use over-the-door organizers with pockets for spices, or build custom racks from 1×4 boards spaced to hold cans or bottles. Ensure the door hinges handle added weight, pantry doors loaded with 20+ pounds of jars may need a third hinge for support.
Vertical dividers between shelves keep baking sheets, cutting boards, and platters organized in small pantries. Cut ¼-inch plywood into dividers and secure them perpendicular to shelves with small brackets or wood glue. Space dividers 2–3 inches apart for most items.
Safety reminder: Overloading narrow shelves creates tip-out risk. For shelves deeper than 12 inches with less than 24 inches between side supports, add a center support cleat or bracket to prevent sagging and potential collapse.
Conclusion
Custom pantry shelving adapts to your actual storage needs instead of forcing you into generic solutions. Whether building with solid wood, plywood, wire, or adjustable tracks, proper measuring and stud-mounted installation create systems that outlast store-bought alternatives. Start with one wall or section, test your design, then expand, most pantry projects improve with iteration as you discover what works for your household’s rhythm.