First impressions happen fast, about seven seconds for a potential buyer, neighbor, or guest sizing up a home from the curb. The good news? Boosting curb appeal doesn’t require a full-scale renovation or a contractor’s budget. Most high-impact upgrades can be tackled in a weekend with basic tools, a modest material list, and a willingness to get outside. Whether preparing to sell, welcoming new neighbors, or simply tired of the tired-looking facade, these projects deliver visible results without the hassle of permits, structural work, or specialized trade skills.
Table of Contents
ToggleKey Takeaways
- A fresh coat of paint on your front door in bold colors like navy or forest green is the fastest and most impactful curb appeal upgrade, requiring just one quart of paint and basic prep work.
- Easy curb appeal ideas like updating outdoor lighting with solar stakes or LED fixtures dramatically improve nighttime appeal and can be installed in an afternoon without permits.
- Fresh mulch, strategic plant pruning, and evergreen foundation plantings create a well-maintained appearance year-round at minimal cost and effort.
- Pressure washing and filling cracks in walkways and driveways instantly restores curb appeal by eliminating the neglected appearance of stained or weathered hardscaping.
- Window trim updates and strategically placed shutters frame the home’s exterior and balance a refreshed look without major renovation expenses.
Refresh Your Front Door and Entryway
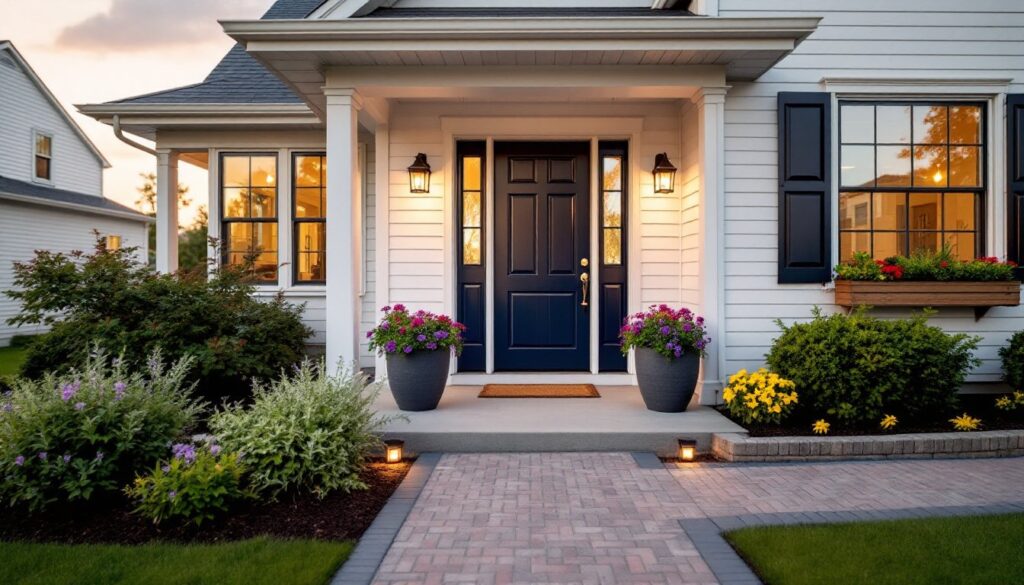
The front door anchors the whole facade. A tired, faded door signals neglect: a sharp, well-maintained one suggests care and attention throughout the property.
Paint is the fastest fix. Choose a high-gloss or semi-gloss exterior acrylic latex paint in a bold, contrasting color, navy, charcoal, deep red, or forest green work well against neutral siding. One quart covers a standard 3’×7′ door with two coats. Prep matters: sand lightly with 120-grit sandpaper, wipe clean with a damp rag, and prime any bare wood or metal. Skip the primer on previously painted surfaces in good condition, but don’t skip the prep.
If the door itself is beyond saving (warped, cracked, or rotted), replacement isn’t as daunting as it sounds. A pre-hung fiberglass or steel door runs $150–$400, installs in 2–3 hours, and requires only a circular saw, level, shims, and a drill. Fiberglass resists dents and weathers better than wood: steel is more affordable but dents easier.
Hardware upgrades make a surprising difference. Swap builder-grade locksets and hinges for oil-rubbed bronze, matte black, or brushed nickel finishes. Match the finish across the door knocker, house numbers, and mail slot for a cohesive look. Most locksets install with a Phillips screwdriver and take 15 minutes per handle.
Add a new welcome mat, natural coir holds up better than synthetic, and flank the door with matching planters. Symmetry reads as intentional: mismatched pots read as accidental.
Upgrade Your Outdoor Lighting
Dim, outdated, or missing exterior lighting makes a home feel unsafe and uninviting after dark. Modern fixtures are inexpensive, often wireless, and dramatically improve nighttime curb appeal.
Start with the entry. Replace the porch light with a fixture scaled to the door, if the door is 36″ wide, aim for a light 8–12″ wide and 12–18″ tall. Oversized lanterns work on two-story entries: compact sconces suit ranch-style homes. Most fixtures wire into a standard junction box with a ground, neutral, and hot wire. Turn off the breaker, confirm power is off with a non-contact voltage tester, and connect like-to-like: black to black, white to white, ground to ground. If the existing box is loose or rusted, replace it with a weather-rated pancake box before mounting the new light.
Pathway lighting guides visitors and highlights landscaping. Solar stake lights have improved, they’re no longer the dim, wobbly versions from a decade ago. Look for models with monocrystalline solar panels and at least 15 lumens per fixture. Space them 6–8 feet apart along walks and driveways. For brighter, more reliable illumination, run low-voltage LED landscape lights on a transformer. A basic kit (transformer, wire, six fixtures) costs $80–$150 and installs in an afternoon. Bury the 12- or 14-gauge wire 2–3 inches deep in a shallow trench.
Uplighting adds drama. Position small LED spotlights at the base of a tree, architectural column, or the home’s corner to wash light upward. Choose warm white (2700–3000K) for a welcoming glow: cool white reads as commercial.
Add Life with Low-Maintenance Landscaping
Dead patches, overgrown shrubs, and bare beds undermine every other upgrade. The goal isn’t to install a showpiece garden, it’s to establish a clean, intentional framework that looks cared for year-round.
Mulch makes an instant impact. A fresh 2–3 inch layer of hardwood mulch in beds around the foundation creates contrast, suppresses weeds, and signals maintenance. One cubic yard covers roughly 100 square feet at 3 inches deep. Edge the beds first with a half-moon edger or a sharp spade to define the border between lawn and planting area. Avoid piling mulch against siding or tree trunks, leave a 2-inch gap to prevent moisture rot and pest problems.
Choose perennials that deliver. For year-round structure, plant evergreen shrubs like boxwood (zones 5–9), holly (zones 5–9), or juniper (zones 3–9). These hold their shape, require minimal pruning, and anchor the landscape when annuals fade. Add color with proven performers: hostas for shade, daylilies for sun, or ornamental grasses like Karl Foerster feather reed grass, which provides height and movement without flopping. Avoid high-maintenance specimens that demand deadheading, staking, or frequent division unless committed to the upkeep.
Many farmhouse and country-style homes pair traditional foundation plantings with informal cottage garden touches, a balance that works in both suburban and rural settings.
Trim what’s there. Overgrown shrubs blocking windows or brushing the siding should be pruned back to their natural shape. Use bypass pruners for stems under ¾”, loppers for up to 1½”, and a pruning saw for anything larger. Don’t shear everything into tight balls unless working with formal hedges. Most flowering shrubs bloom on old wood, so prune them right after they flower: those that bloom on new wood (like roses and butterfly bush) get cut back in early spring.
Clean and Define Your Walkways and Driveway
Stained, cracked, or weed-choked hardscaping drags down the entire front yard. Cleaning and defining these surfaces takes more elbow grease than skill, but the payoff is immediate.
Pressure wash concrete and asphalt. Rent or buy a gas-powered pressure washer rated 2500–3000 PSI for driveways and walks. Use a 15- or 25-degree nozzle and work in overlapping passes, holding the wand 12–18 inches from the surface. Wear safety goggles and closed-toe boots, the spray can kick up debris and cut skin at close range. For oil stains, apply a concrete degreaser, let it sit 10 minutes, then pressure wash. Avoid using a pressure washer on old, spalling concrete: high pressure can worsen surface damage.
Fill cracks before they spread. Hairline cracks in concrete can be sealed with concrete crack filler from a caulk gun. Wider cracks (¼”–½”) need vinyl concrete patch or rapid-setting cement. Clean out loose debris with a wire brush, dampen the crack, trowel in the filler, and smooth. For asphalt, use rubberized asphalt crack filler, applied with a pour pot or caulk gun. Work in temperatures above 50°F for proper adhesion.
Edge and redefine borders. Over time, grass creeps into walkways and beds. Re-cut the edges with a flat-blade edger or spade, creating a clean vertical line. For brick or paver walkways, pull weeds from the joints, add fresh polymeric sand, and sweep it into the gaps. Mist with water to activate the binders, which lock the sand in place and resist future weed growth.
If the walkway material itself is tired or mismatched with updated exterior siding materials, consider a simple overlay or replacement with pavers, flagstone, or stamped concrete.
Enhance Windows with Shutters or Fresh Trim
Windows frame the face of a home. Faded trim or missing shutters leave them looking unfinished.
Repaint existing trim. Use the same exterior acrylic latex as the door, in semi-gloss for easy cleaning. Mask the glass and siding with 1.5″ painter’s tape and plastic sheeting. Sand flaking paint with 100-grit sandpaper, prime any bare wood with an oil-based exterior primer, and apply two finish coats. A 2″ angled sash brush gives the best control around muntins and sills. Let each coat dry fully, usually 4–6 hours in moderate humidity.
Add or replace shutters. Functional shutters should be sized to cover the window when closed (each shutter half the window width). Decorative shutters, common on modern builds, should still respect that proportion. Vinyl shutters are inexpensive ($25–$50 per pair) and low-maintenance but can look cheap. Composite or PVC shutters ($75–$150 per pair) hold paint better and resist warping. Wood shutters offer the best appearance but require regular repainting.
Mount shutters with shutter fasteners or stainless steel screws into the wall sheathing or studs, not just into siding. Hollow vinyl siding won’t hold weight. For brick or stucco, use masonry anchors.
Window boxes add charm and vertical interest, especially on single-story homes. Build simple boxes from cedar 1×6 or 1×8 boards, which resist rot without treatment. Size them slightly shorter than the window width, mount with galvanized L-brackets, and line with landscape fabric before filling with potting mix. Ensure boxes have drainage holes every 6 inches to prevent waterlogging.
Introduce Color with Planters and Window Boxes
Strategic pops of color draw the eye and soften hard architectural lines. Planters and window boxes offer flexibility, swap out plants seasonally without committing to permanent landscaping.
Choose containers that match the home’s style. Modern homes suit clean-lined fiberglass or powder-coated metal planters. Traditional homes pair well with terra cotta, ceramic, or classic urn shapes. Avoid plastic pots that fade and crack after a season in the sun. Size matters: a front door flanked by two 16″–20″ diameter planters feels balanced: anything smaller looks tentative.
Plant for scale and season. Use the thriller-filler-spiller formula: one tall focal plant (the thriller), mid-height plants to fill volume (the filler), and trailing plants that cascade over the edge (the spiller). For spring, pair tulips or daffodils (thriller) with pansies (filler) and trailing ivy (spiller). Summer combinations might include a dwarf evergreen or ornamental grass (thriller), petunias or calibrachoa (filler), and sweet potato vine (spiller). Fall works with ornamental kale, mums, and trailing sedum.
Maintenance requirements vary. Annuals deliver continuous color but need weekly watering and deadheading. Perennials and evergreens require less fuss but offer subtler impact. In containers, even hardy perennials may not survive winter in cold climates, roots freeze faster in pots than in-ground. Plan to refresh or replant seasonally.
Many gardeners find inspiration in curated planting schemes and container design ideas, which emphasize texture and foliage over constant blooms. Pair containers with fresh mulch and a well-edged bed for a cohesive, finished look.
Conclusion
Curb appeal isn’t about perfection, it’s about intentionality. A freshly painted door, clean walkways, updated lighting, and a few well-chosen plants signal that someone cares about the property. Most of these projects cost under $200 in materials, require no permits, and deliver visible results in a single weekend. Tackle one or two now, bookmark the rest for next month. The front yard will thank you.