Tall walls and high ceilings can turn a room into a cathedral, or make it feel cold and unfinished. The difference comes down to how you handle that vertical expanse. A single piece of art hung at standard height looks lost. Empty walls above 10 feet read as neglected space, not intentional design. Decorating tall walls isn’t about scaling up your usual approach: it requires rethinking proportion, installation methods, and visual weight. This guide walks through practical solutions that work with the architecture, not against it.
Table of Contents
ToggleKey Takeaways
- High ceiling tall wall decor requires rethinking proportion and scale—a single 24×36-inch canvas on a 14-foot wall leaves 10 feet of bare space that reads as incomplete rather than minimalist.
- Large-scale art (60×80 inches or larger), tapestries, and multi-panel installations are more effective than standard-sized pieces for filling vertical expanse and creating visual impact.
- Proper installation is critical: locate studs with a stud finder, use heavy-duty picture hangers rated for 50+ pounds, and employ laser levels to ensure safe anchoring above 10 feet.
- Gallery walls work best on tall walls when arranged vertically in columns (three stacks of four frames) rather than horizontal rows, drawing the eye upward and reinforcing height as an asset.
- Combine multiple decorating approaches—oversized art, mirrors, floating shelves, living walls, and architectural elements like paneling or faux beams—to avoid a one-note look and fully utilize high ceiling tall wall space.
- Functional solutions like floor-to-ceiling mirrors, vertical planters, and tall bookcases anchored to studs add both visual interest and practical storage without leaving dead zones on bare walls.
Why High Ceilings Need a Different Decorating Approach
Standard 8-foot ceilings create natural boundaries for furniture and decor. Once you hit 10, 12, or 14 feet, those rules break down. Visual weight shifts. A sofa and a single painting no longer anchor the room, they highlight how much wall you’re ignoring above them.
Proportional scale matters more than aesthetics alone. A 24×36-inch canvas centered on a 14-foot wall leaves roughly 10 feet of bare space above it. The eye registers that gap as incomplete, not minimalist. You need larger pieces, stacked arrangements, or vertical elements that guide the gaze upward without creating dead zones.
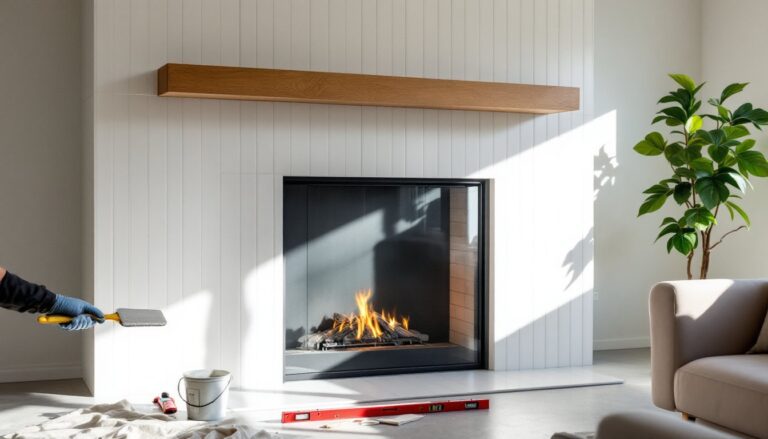
Installation logistics also change. Hanging decor above 10 feet often requires an extension ladder (not a step stool), a second person for leveling, and proper anchoring into studs or blocking, drywall anchors alone won’t support the weight and lever forces at that height. Plan installations carefully. Measure twice, drill once, and use a laser level to avoid eyeballing angles from a ladder.
Ignoring the upper two-thirds of a tall wall doesn’t make a room feel open, it makes it feel unfinished. The goal is balance: filling the space without cluttering it.
Large-Scale Art and Statement Pieces
Oversized canvas prints or framed art (60×80 inches or larger) work when the wall can support them structurally and visually. For drywall, locate studs with a stud finder and use heavy-duty picture hangers rated for 50+ pounds. If studs don’t align with your desired placement, install a horizontal cleat system: screw a 1×2 or 1×3 board into multiple studs, then hang the frame from the cleat. This distributes weight and simplifies leveling.
Tapestries and textile wall hangings add texture without the weight of framed art. Mount a curtain rod or wooden dowel near the ceiling line, use rod brackets screwed into studs or toggle bolts rated for the span. Let the fabric drop 8–12 feet for impact. Woven pieces, macramé, or even vintage rugs work well here. They soften acoustics in rooms with hard surfaces, a bonus in high-ceiling spaces that echo.
Multi-panel installations (diptychs, triptychs, or larger modular sets) can span 8–15 feet horizontally and 6–10 feet vertically. Space panels 2–4 inches apart and treat the grouping as a single composition. Use a template (craft paper taped to the wall) to map placement before drilling. This avoids the “nail graveyard” problem when you need to adjust.
For renters or anyone avoiding wall damage, tension-mounted systems or picture rail molding installed near the ceiling allow cables or chains to suspend art. This method works best with lighter pieces (under 20 pounds per cable) and gives flexibility to swap decor without patching holes.
Gallery Walls That Reach New Heights
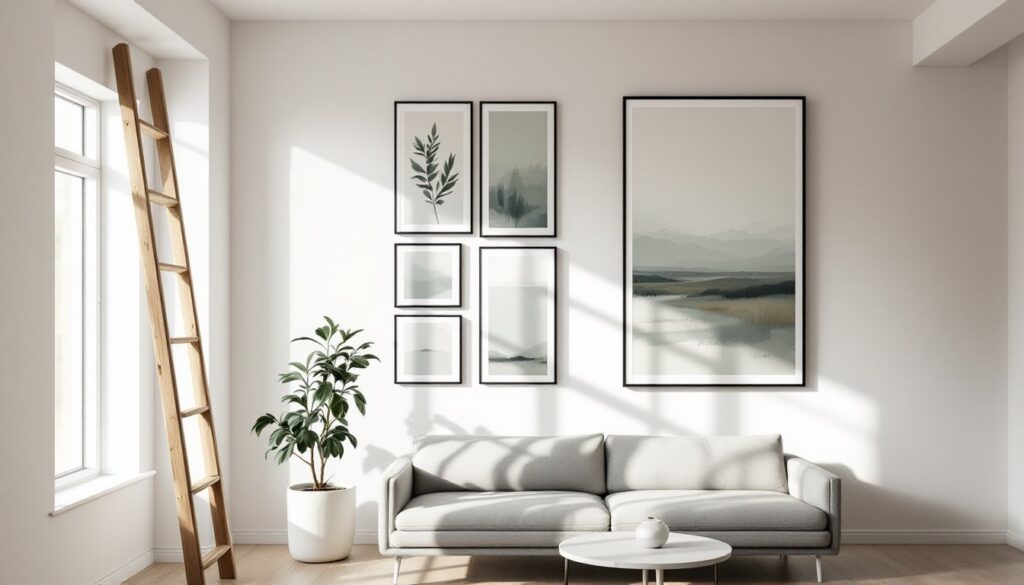
Traditional gallery walls cluster frames between 57–65 inches (eye level). For tall walls, extend that grid upward in tiers. Start at standard height, then build a second or third row above, maintaining consistent spacing (4–6 inches between frames). The result reads as intentional, not random.
Vertical emphasis works better than horizontal sprawl on a tall wall. Arrange frames in columns rather than rows, three stacks of four frames each, for example, instead of four rows of three. This draws the eye up and reinforces the room’s height as an asset, not a challenge.
Frame sizing should vary to avoid a cookie-cutter look, but keep a unifying element: matching frames, a consistent mat color, or a common subject (all black-and-white photos, all botanical prints). Mix 8×10s, 11×14s, and 16×20s within the arrangement. Larger pieces anchor the bottom: smaller ones taper toward the top.
Install the bottom row first, level it perfectly, then work upward. Use a laser level or a long straightedge to align vertical columns. Adhesive picture-hanging strips work for lightweight frames (under 5 pounds), but anything heavier needs nails or screws into studs. For plaster walls, pre-drill pilot holes to prevent cracking.
Many modern home decor ideas incorporate gallery walls in unconventional spaces, staircases, hallways, or above built-ins, but tall walls in living rooms and entryways offer the most dramatic canvas.
Vertical Elements: Mirrors, Tapestries, and Panels
Floor-to-ceiling mirrors are a functional statement. A full-length mirror (20–30 inches wide, 8–12 feet tall) can lean against the wall or mount flush. Leaning is simpler, no drilling, but requires a safety strap anchored to a stud to prevent tipping. For flush mounting, use mirror clips or a French cleat system rated for the mirror’s weight (large mirrors easily exceed 50 pounds).
Mirrors amplify light and visually double the room’s volume. Position them opposite windows or light sources to maximize reflection. Avoid placing mirrors where they’ll reflect clutter or unflattering angles, no one wants a mirror that showcases the back of the sofa.
Decorative wood panels or board-and-batten treatments add architectural interest. Install vertical 1×4 or 1×6 boards at regular intervals (12–18 inches on center) over the existing drywall, running from floor to ceiling or from chair rail height upward. Paint them a contrasting color or the same shade as the wall for subtle texture. This works especially well in modern farmhouse or transitional interiors.
For a less permanent option, peel-and-stick wood planks or 3D wall panels (often made from PVC or MDF) install without major carpentry. These come in various patterns, geometric, slatted, or embossed. They’re lightweight enough to adhere with construction adhesive, though adding a few screws into studs improves longevity.
Fabric panels stretched over wooden frames create custom art on a budget. Build simple frames from 1×2 furring strips, stretch canvas or upholstery fabric over them, and staple the fabric to the back. Mount multiple panels in a grid for a cohesive, oversized installation.
Architectural Features and DIY Solutions
Shiplap or tongue-and-groove paneling installed vertically emphasizes height. Use actual wood (pine, cedar, or primed MDF) or look-alike alternatives like nickel-gap PVC planks. Start at the ceiling and work down, ensuring the first plank is level, it sets the alignment for everything below. Nail into studs every 16 inches: finish with caulk and paint or stain.
If structural changes aren’t an option, applied molding creates the illusion of architectural detail. Install picture frame molding, grid patterns, or oversized crown molding at the ceiling line to break up a tall expanse. Paint the molding and wall in contrasting tones (white molding on a navy wall, for example) to define the geometry.
Faux beams add rustic or industrial character without the weight of real timber. Lightweight polyurethane beams (available at most home centers) snap over blocking screwed into ceiling joists. They come pre-stained or paintable. Space them 3–5 feet apart for a coffered effect, or run a single beam horizontally partway down the wall as a visual divider.
Plate rails or picture ledges mounted 8–10 feet up provide display space for art, plants, or seasonal decor. Use a level and stud finder to install the ledge securely: anything displayed at that height becomes a projectile if it falls. Rotate objects seasonally to keep the display fresh without rehanging.
Some design tips for high walls suggest layering techniques, combining paneling with art or shelving with plants, to avoid a one-note look.
Plants, Shelving, and Functional Tall Wall Decor
Climbing plants on trellises bring life to vertical space. Mount a wooden or metal trellis (4–8 feet tall) into wall studs, then train pothos, philodendron, or ivy up it. Use small screw-in hooks or adhesive clips to guide vines along the trellis without damaging stems. Water drainage is critical, use pots with trays or wall-mounted planters designed for indoor use to avoid moisture damage.
Vertical planters or living wall systems (modular pockets or hydroponic panels) create a green wall effect. These systems require proper lighting (often supplemented with grow lights if natural light is insufficient) and regular watering schedules. They’re striking but not low-maintenance: plan accordingly.
Floating shelves installed in a staggered or ladder configuration add storage and display. Use heavy-duty shelf brackets or concealed support rods anchored into studs. For shelves above 8 feet, keep displayed items lightweight, books, small plants, or decorative objects. Avoid heavy ceramics or glass unless you’re confident in the anchoring.
Tall bookcases (8–10 feet) fill vertical space with function. Anchor the top to wall studs with furniture straps to prevent tipping, this is non-negotiable, especially in homes with kids or pets. Style the top shelves with oversized baskets or less-used items: reserve eye-level shelves for frequently accessed books or decor.
Resources like Homedit showcase creative shelving configurations that work in tight or awkward tall spaces, from corner units to asymmetrical designs.
Lighting fixtures can double as decor. A dramatic chandelier, pendant cluster, or vertical sconce draws the eye upward. Ensure electrical boxes are properly rated for the fixture’s weight and that wiring meets NEC (National Electrical Code) standards. When in doubt, hire a licensed electrician, ceiling fixtures in high-ceiling rooms often require lifts or scaffolding for safe installation.
Conclusion
Tall walls offer more opportunity than obstacle once you match scale and method to the space. Large art, layered galleries, vertical greenery, and architectural treatments all work, often in combination. The key is proper installation: locate studs, use rated hardware, and measure carefully before committing to holes. Don’t let the height intimidate the design. Treat the full wall as usable space, and the room transforms.